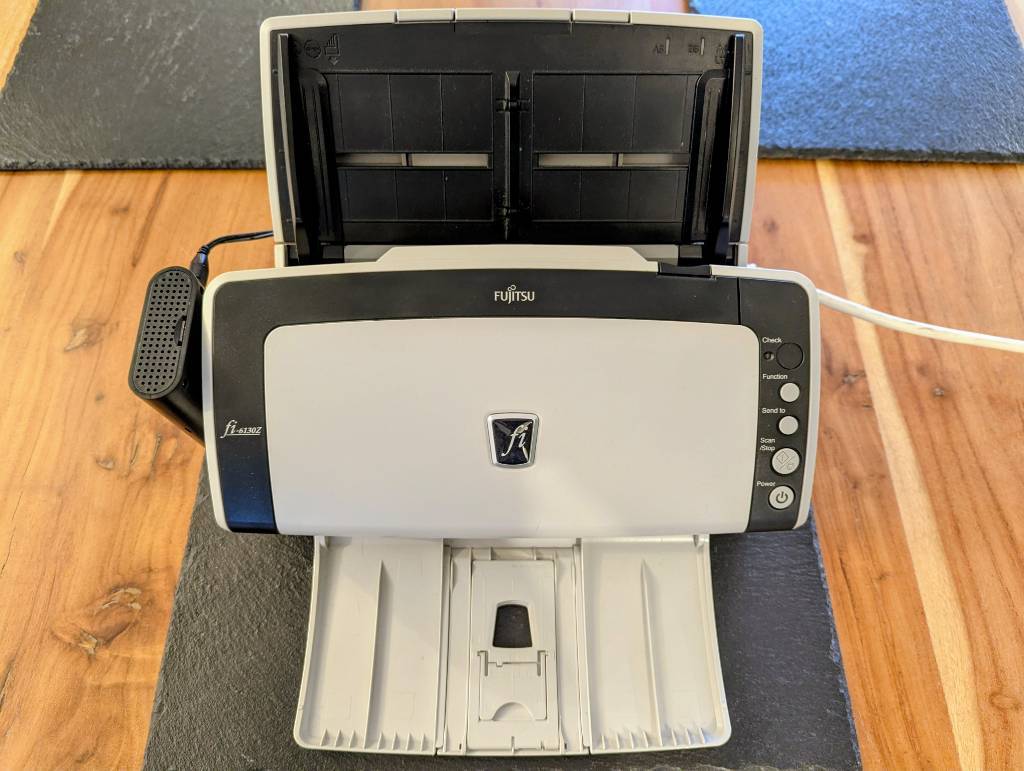
The biggest friction point in a paperless workflow is the physical act of scanning. You often have to walk to the scanner, open an application on a computer, preview the scan, and manually move the file.
By pairing a Raspberry Pi with a robust document scanner (like the Fujitsu fi-6130z), you can build a “smart” appliance. This setup allows you to drop a stack of papers into the feeder, press the hardware button, and have the files automatically appear in Paperless-ngx.
This guide covers setting up a headless Raspberry Pi (Debian) to listen for hardware buttons, process scans with scanimage, transfer them via NFS, and shut down gracefully when the scanner is turned off.
Prerequisites
- Scanner: A SANE-supported USB document scanner (e.g., Fujitsu fi-6130z).
- Compute: Raspberry Pi (Headless).
- OS: Raspberry Pi OS Lite (Debian Bookworm) or similar.
- Destination: A running instance of Paperless-ngx.
1. System Prep & Installation
Start with a fresh headless installation. Update your system and install the necessary SANE backends and the scanbd daemon.
sudo apt update
sudo apt install sane sane-utils scanbd nfs-common -y
Verify your scanner is recognized by SANE:
sudo scanimage -L
You should see your device listed (e.g., device 'fujitsu:fi-6130z:...').
2. Mount the Paperless Consumption Folder (NFS)
To get scans into Paperless-ngx instantly, we mount the consume directory from the server directly to the Pi.
Create the local mount point:
sudo mkdir -p /opt/paperless/consume
Edit your filesystem table:
sudo vi /etc/fstab
Add the following line to mount the share on boot. This configuration uses hard mounting with intr (interruptible) to ensure data integrity without hanging the system indefinitely if the server is unreachable.
my-mega-server.local.com:/opt/paperless-ngx/consume /opt/paperless/consume nfs rw,hard,intr,rsize=8192,wsize=8192,timeo=14 0 0
Mount the drive to test:
sudo mount -a
Alternative Transfer Methods
While NFS is fast and integrates at the filesystem level, there are other ways to move files if you prefer not to use NFS:
- Rsync: A simple cron job can
rsyncfiles from a local folder on the Pi to the server every minute. - SCP: The scanning script can be modified to
scpthe PDF immediately after creation.
3. Configure the Button Trigger (scanbd)
scanbd (Scanner Button Daemon) polls the scanner hardware. We need to configure it to detect the button press and hand control over to our scanning script.
Edit the config file:
sudo vi /etc/scanbd/scanbd.conf
Locate the action scan block. For Fujitsu scanners, the button press is often a numerical trigger.
action scan {
        filter = "^scan.*"
        numerical-trigger {
                from-value = 1
                to-value   = 0
        }
        desc   = "Scan duplex to paperless via NFS"
        # Script path is relative to the scriptdir (usually /etc/scanbd/scripts/)
        script = "scan-duplex.script"
}
4. The Scanning Script
Create the script that scanbd executes. This script handles the actual scanning logic.
sudo vi /etc/scanbd/scripts/scan-duplex.script
Paste the following content. This uses scanimage with software cropping (swcrop) to handle mixed receipt sizes automatically, skipping blank pages to keep your digital archive clean.
#!/bin/bash
#
#  scanbd - KMUX scanner button daemon
#  Script to scan duplex, auto-crop, and save to Paperless-ngx via NFS
#

logger -t "scanbd: $0" "Begin of $SCANBD_ACTION for device $SCANBD_DEVICE"

scanner=$(echo "$SCANBD_DEVICE" | cut -d ':' -f 1)

# Generate a timestamp for the filename
timestamp=`date +"%m-%d-%y_%H-%M-%S"`

# Execute scan
# --source "ADF Duplex": Scans front and back
# --swcrop=yes: Software cropping for mixed sizes (receipts vs A4)
# --swskip=30: Skip pages with <30% content (blank page removal)
# --page-height: Max height (set high to accommodate long receipts)
# --batch: Writes output directly to the NFS mount
scanimage --format=pdf \
    --device "$SCANBD_DEVICE" \
    --source "ADF Duplex" \
    --mode Color \
    --resolution 300 \
    --swcrop=yes \
    --swskip=30 \
    --page-height=879.489mm \
    --batch=/opt/paperless/consume/Scan-$timestamp.pdf

logger -t "scanbd: $0" "End   of $SCANBD_ACTION for device $SCANBD_DEVICE"
Make the script executable:
sudo chmod +x /etc/scanbd/scripts/scan-duplex.script
5. Automated Shutdown (Udev Rule)
Since this is a headless appliance, you don’t want to SSH in just to turn it off. We can use a udev rule to detect when the scanner (the only USB device) is turned off or unplugged, triggering a safe system shutdown.
1. Create the Shutdown Script
sudo vi /usr/local/bin/shutdown-scanner.sh
#!/bin/sh
sudo shutdown -h now
Make it executable: sudo chmod +x /usr/local/bin/shutdown-scanner.sh
2. Create the Udev Rule
sudo vi /etc/udev/rules.d/01-shutdown-on-scanner.rules
# Shutdown the RPI when the scanner is removed
SUBSYSTEM=="usb", ACTION=="remove", RUN+="/usr/local/bin/shutdown-scanner.sh"
Reload rules: sudo udevadm control --reload
Now, when you flip the power switch on the scanner, the Pi will detect the USB removal and shut itself down.
6. Protect the SD Card (OverlayFS)
To prevent SD card corruption from sudden power loss (or the hard shutdown trigger), enable OverlayFS. This makes the underlying filesystem read-only and writes all changes to RAM.
- Run
sudo raspi-config - Navigate to Performance Options > Overlay File System.
- Select Yes to enable it.
- Select Yes to make the boot partition write-protected.
- Reboot.
Summary of Workflow
- Boot: Turn on the Scanner and Pi.
- Scan: Insert documents and press the “Scan” button.
- Process: The Pi scans, crops, and saves directly to the NFS share.
- Ingest: Paperless-ngx picks up the file immediately.
- Shutdown: Turn off the Scanner; the Pi powers down automatically.